How to Propagate Rosemary From Cuttings (With Photos)
Rosemary is a Mediterranean herb that is very easy to propagate from cuttings. In this article I share with you all the steps, tricks and hacks that I have learned from propagating rosemary and lavender from cuttings for many years, to ensure the highest rate of success with your propagated cuttings.
I personally propagate rosemary every year as it is so easy and a great way to gain many extra plants for free and from my experience I have developed the best formula and know what to avoid.
The best way to propagate rosemary is from a cutting planted in soil. This method has a much greater rate of success then growing rosemary from seed or growing rosemary cuttings in water.
Keep reading for the best step by step guide to propagate rosemary…
When is the Best Time to Take Rosemary Cuttings?
In my experience the best time of year to take rosemary cuttings from propagation is early Spring.
The temperatures in Spring are still relatively cool which means that whilst your cutting is in a vulnerable state without any roots, it does not have to contend with the high temperatures and blazing sunshine of. Summer which can dry the cuttings out before the roots develop.
In Spring the rosemary cutting can benefit from the bright light which provides the energy for growing roots and the roots have a chance to grow and establish so they are able to draw up moisture and nutrients before having to withstand Summer heat and sun.
May and June are the best months for taking rosemary cuttings as the threat of frost has usually passed and the temperature range is usually favorable so that the cuttings do not lose too much water from transpiration.
However I have personally propagated rosemary from cuttings in the Summer and early Fall.
The early Fall (September and early October particularly) is still a good time for propagating as the soil has had all year to warm up and warm soil can increase the rate of root development.
With cuttings taken in the Fall it is important to provide protection over Winter to prevent the developing plant from freezing.
With Summer cuttings, more precautions are warranted to prevent the cuttings from drying up such as clear plastic bags to retain humidity, more shade and frequent watering etc.
I would not recommend taking cuttings in Winter as rosemary is usually dormant, therefore the roots would grow to slowly for any real propagation success.
The Most Effective Way to Propagate Rosemary
The best way to propagate rosemary is by taking cuttings and planting it straight into soil rather then propagating in water.
As rosemary is adapted to tolerate drought, it is more susceptible to rot then most plants, so the cuttings often die back before developing roots.
Rosemary is a Mediterranean herb that grows naturally in gritty soils that do not hold much moisture, so I find it is always best to replicate these conditions when growing and propagating rosemary cuttings.
However rosemary can develop roots in water but in my experience the roots that grow are much more delicate the roots that grow in soil and therefore are liable to break or be damaged when transferring the rosemary cutting into soil and planting up.
I have had a much higher rate of success by propagation straight into potting soil.
How Long Does Rosemary Take to Root?
Typically, rosemary cuttings take 3 to 6 weeks to develop a root system, but it can depend on the time of year and the temperature of the soil.
If the soil is warm and the the growing conditions are optimal and the cuttings are not having to contend with stress from temperatures and sunlight then cuttings develop a root system as quick as 3 weeks, particularly in Spring.
Whereas in colder weather rosemary can take as long as 6 weeks to develop roots.
You can tell when rosemary cuttings develop roots in soil when the cutting starts to produce new growth with a longer stem, side shoots or new leaves growing.
The new growth indicates the root system is able to uptake the moisture and nutrients required for the rosemary to grow successfully.
It is also worth noting that the type of cutting can influence how quickly the cuttings root.
Rosemary cuttings with soft flexible, semi ripe growth develop roots more quickly then cuttings take from older woodier growth.
Rosemary Cuttings Root More Quickly with Hormone Rooting Powder
It is not necessary to use hormone root powder to grow rosemary from cuttings successfully. Rosemary can root just by planting them directly in the soil.
However, in my experience with propagating both rosemary and lavender cuttings, hormone rooting powder increases the rate of growth of the roots and therefore they are a greater number of successfully propagated rosemary plants.
As the roots are quicker to establish the rosemary plant grows much better.
With a more developed root system, the rosemary cutting can draw up moisture more efficiently which makes it more resilient to hot weather in the Summer and is far less likely to dry out.
Whereas cuttings without hormone rooting powder can often succumb to hot weather.
The cuttings with hormone rooting powder also matured and hardened off before Winter better and actually grow better the following year as they have a head start compared to less well established cuttings without root hormone powder.
So on that basis I do recommend hormone rooting powder for rosemary cuttings is it is relatively inexpensive and I had good results.
The Best Soil For Propagating Rosemary Cuttings
It is critical to use the right potting mix for propagating rosemary from cuttings as rosemary can be particularly vulnerable to root rot if it is planted in the wrong type of soil.
In the natural Mediterranean habitat rosemary grows in gritty soil on hillsides with excellent drainage and relatively low nutrient soil.
It is essential to recreate these soil conditions for your rosemary cuttings to prevent rot.
If the cuttings are planted in damp compost that retains too much moisture or drains too slowly then they are likely to develop root rot and die back without growing.
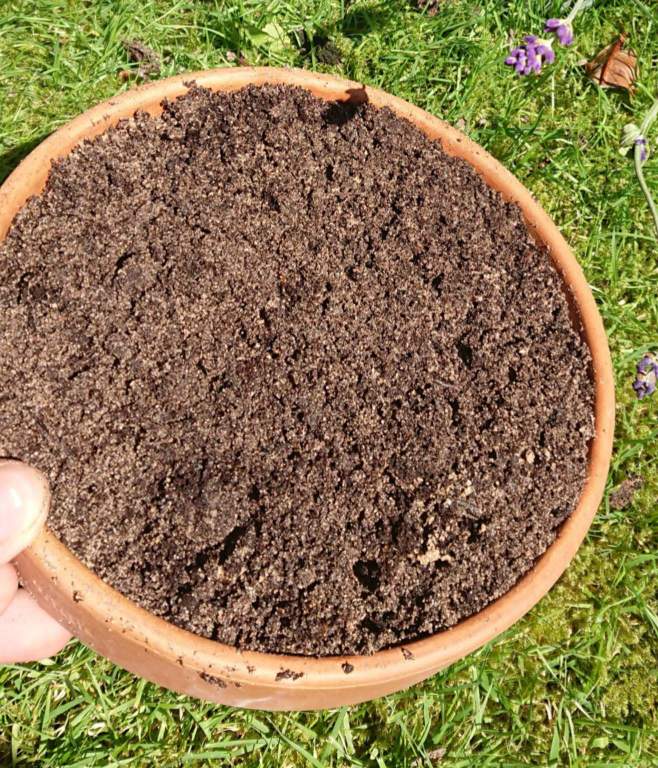
To emulate the rosemary’s preferred soil type, use around 30% horticultural grit or sand with around 70% peat free potting soil.
This potting mix achieves the balance of good drainage, soil structure and level of nutrients to promote good growth for your rosemary cuttings.
It is important to avoid using any potting soil that has any added fertilizer as rosemary prefers low nutrient soil.
Excess fertilizer causes the rosemary to grow leggy and reduces the concentration of essential oils in the leaves so that they do not smell as potent or taste as strong.
Step 1: Propagating Rosemary Cuttings – Choose the Right Pot and Potting Mix
Choose a pot with a drainage hole in the base and fill it with a potting mix of around 30% horticultural sand or grit and 70% potting soil.
I personally recommend propagating rosemary cuttings in a terracotta or unglazed clay pot as these materials are porous which allows the potting soil to dry out more evenly. This is important because rosemary is a drought tolerant herb that is adapted to dryer conditions and can often rot if the soil is too wet.
Plastic pots are impermeable and can retain moisture too long for the rosemary cuttings to tolerate.
In the photos I have used horticultural sand but grit and perlite perform just as well.
Water the potting mix now, before placing the cuttings in the soil to allow the soil to settle and also to prevent the soil around the cuttings washing away.
Step 2: Choose the Best Cuttings for Propagation
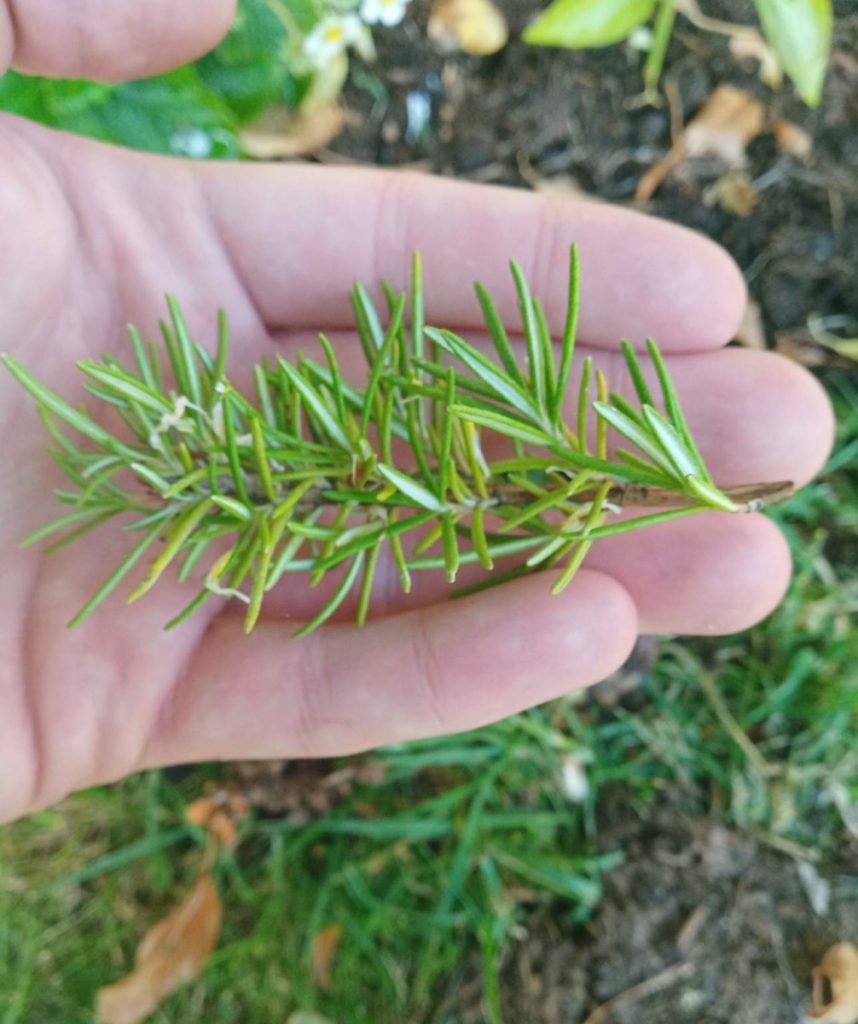
Select a healthy looking stem for cuttings rather any weaker, thinner straggly looking stems. Ideally choose semi ripe growth.
‘Semi ripe’ in this context just means selecting a stem that is roughly a month or so old with the top of the growth being greener and more flexible whereas further down, the cutting has hardened off slightly and is more firm.
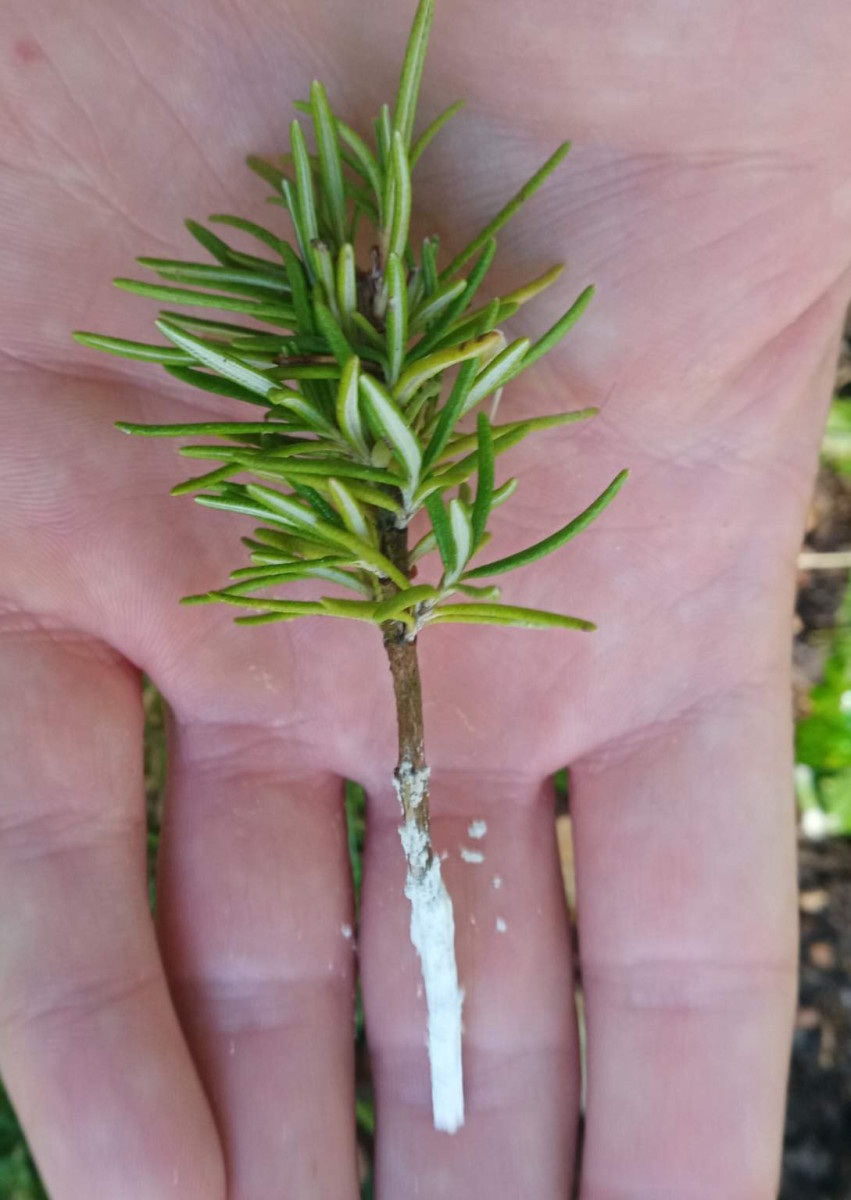
Cut a length of rosemary that around 6 inches long with a sharp pair of pruners.
With sharp pruners, cut back any leaves that are in the bottom half of the cutting.
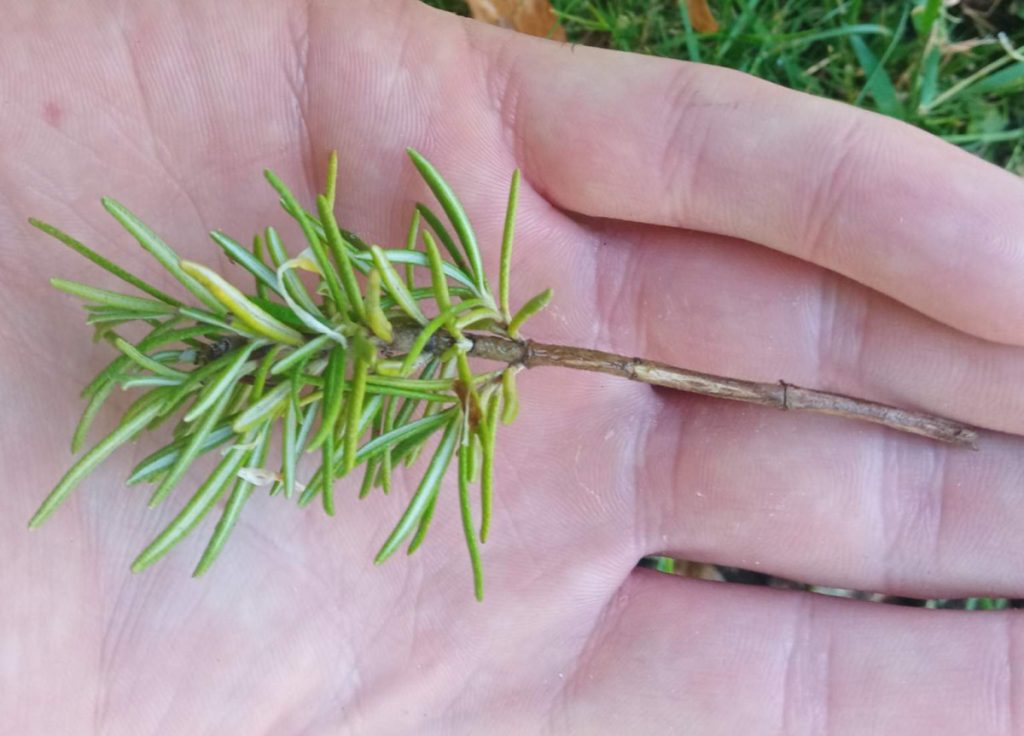
The more leaves the cutting has the more moisture it will lose, so removing the lower leaves whilst the cutting still has no roots increases its longevity and reduces the risk of it drying out and dying.
I should emphasize it is important to leave some of the leaves at the top of the cutting to provide the cutting with the energy to grow its roots.
Note that the roots actually emerge from a leaf node, so by removing the lower leaves of the cutting, you are exposing the nodes to the soil from which the roots develop.
The leaf node is a highly adaptable part of the plant that is capable of growing new leaves branches and roots to ensure the survival of the plant.
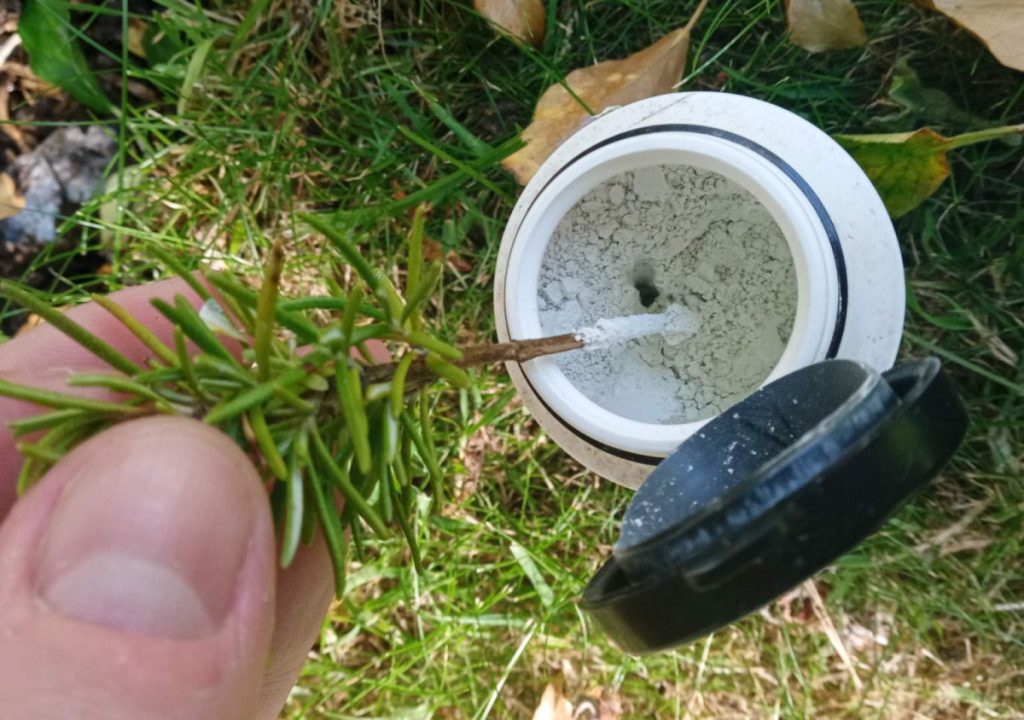
Step 3: Coat the Bottom 3 Inches of the Rosemary Cutting in Hormone Rooting Powder

Once you have removed the lower leaves of the cutting, then dip it into a pot of hormone rooting powder ensuring the bottom 2 or 3 inches of the cutting is coated with the powder.
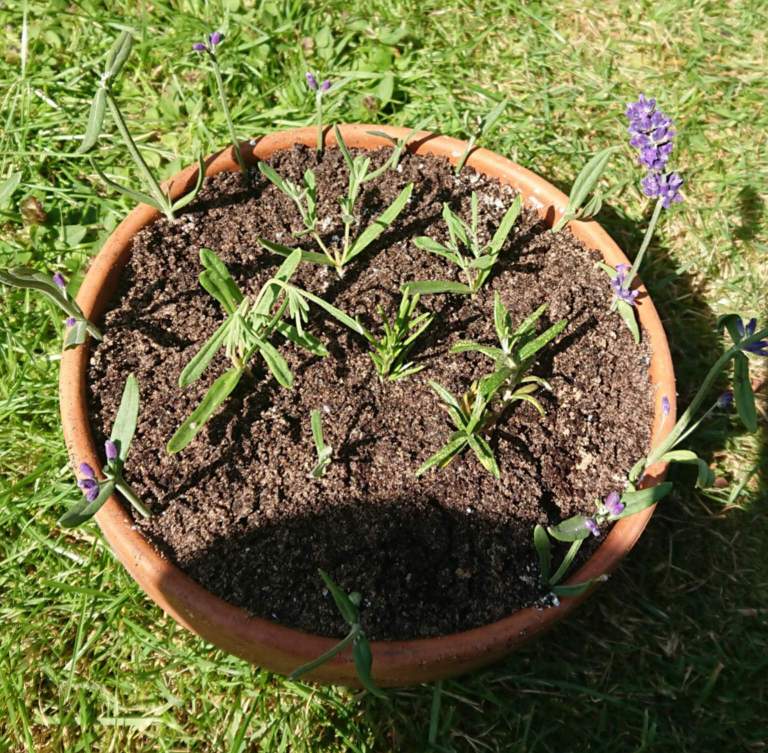
The potting mix should be soft enough in texture that you can just slot the bottom 2-3 inches of the cutting into the soil primarily at the edge of the pot.
The reason for recommending placing cuttings around the edge is because the pot can provide additional support to prevent the cutting from falling out of its place.
I do personally also place the cuttings in the center of the pot as well just to take advantage of the space and I find most cuttings take well regardless of where they are placed.
It’s best practice to space the cuttings at least 3 inches apart to give each cutting enough space to access light and room for their roots to develop.
Step 4: Take at least 10 Rosemary Cuttings for Propagation
Even if you follow all the steps perfectly and provide the optimal conditions, there is no guarantee for even the most experienced gardener that all your cuttings are going to be successful so it is a good idea to spread your bets.
Being generous with the number of cuttings also has another advantage.
Perhaps the most common reason for rosemary cuttings dying is because the soil is too damp for the drought resistant Mediterranean herb to tolerate.
If you have several cuttings in the soil, evenly spaced out, then they can all draw up moisture which means overall the potting soil does not remain damp for as long as it otherwise would. This helps to achieve the right balance of moisture for them to grow and avoid rotting.
As rosemary is adapted to dryer conditions, root rot from damp soil is usually a bigger threat to the cuttings survival.
If you only have 1 or 2 cuttings in the whole pot then the potting soil dries out more slowly which increases the risk of root rot.
Step 5: Use a Transparent Plastic Bag to Prevent the Cuttings from Drying Out
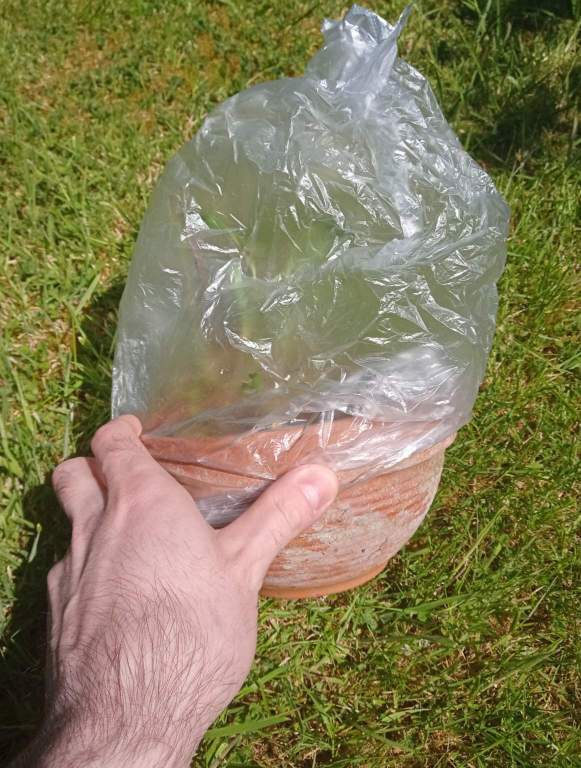
Place a clear plastic bag over the cuttings to conserve moisture.
Whilst the rosemary cuttings do not like excess moisture, when they have just been cut, you are cutting off its means of up taking water and sustaining itself so in the first 3 weeks or so there is a real risk of the cuttings drying out.
The plastic bag creates a slightly more humid micro climate to stop the cuttings drying out too quickly when they do not have roots.
The importance of using a plastic bag is drastically increased if you are propagating in the Summer and the temperature is high and the sun is at its more intense.
Sometimes cuttings can propagate successfully without using a bag if the weather is more overcast and rainy.
Typically the bag is only necessary for the first 3 weeks and after around 2 weeks I cut the top of the bag slightly to create a balance between humidity and ventilation.
Step 6: Where to Place Your Rosemary Cuttings
In my experience it is best to place the rosemary cuttings in bright indirect light for the first 3 weeks or so until I see any new growth.
The new growth on the cutting indicates that it has definitely developed roots, at which point I move the rosemary cuttings to an area of the garden with around 6 hours of morning sun but shaded in the afternoon to protect the cuttings from the more intense heat.
The morning sun is less intense and the temperature is cooler which provides provides the cuttings with energy to photosynthesize and further develop its root system without having to contend with the more intense sun and temperatures of the afternoon which can still dry out the immature rosemary cutting even if it has developed roots.
Step 7: How to Water Rosemary Cuttings
The cuttings need the soil to be evenly moist after watering and then dry slightly before the next bout of watering. How often your rosemary cuttings need watering in your specific climate can depend on several variables such as temperature, sunlight and how much moisture the soil retains.
In my experience, the best way to tell if rosemary cuttings need watering is by assessing the weight of the pot immediately after watering and then periodically lifting the pot up to assess the weight as the soil dries. As soon as the pot feels noticeably lighter, it is a good idea to water the cuttings.
I also would recommend leaving some space in the pot so that you can feel the soil to a fingers depth. Feeling the soil is the best way to detect whether the soil is moist or dry and therefore when it should be watered.
The soil should be mostly somewhat moist with the surface drying out a bit.
As long as the soil is not boggy and you have amended the potting soil with sand or grit then the cuttings should largely be safe from overwatering.
Use a rosette on your watering can that pours out a fine delicate stream of water.
The smaller the can the less water pressure there is, so you can safely water the cuttings without washing the soil away from around the cuttings.
For how to water more mature, fully grown rosemary plants read my article, how to water rosemary plants.
Common Problems With Propagating Rosemary Cuttings
Rosemary cuttings can wilt and die due to both overwatering and underwatering.
If you place your finger in the soil and the soil feels saturated then you have mostly watered the cuttings too often, or their may be a drainage issue with the pot such as a lack of drainage holes in the base or blocked drainage holes.
To avoid problems associated with overwatering, always amend the potting soil with sand or grit to improve drainage, plant you cuttings in a terracotta pot as they dry out more evenly then plastic pots and only water when the surface of the soil starts to feel slightly dry.
I should also emphasize that the plastic bag over the top (to retain humidity) is typically only necessary for 3 weeks as the cuttings should take root and be able to draw up moisture.
If your bag has a lot of condensation on the inside, I would cut little slits in the top corners to allow for some ventilation as too much humidity can also cause the cuttings too rot, when combined with overwatering.
Other common causes for wilting and dying cuttings is often to do with placing the cuttings in too much sunlight.
In the first 3 weeks I place the cuttings in bright indirect light to give the cuttings time to root before having to contend with full sun.
Even after three weeks after the cuttings have theoretically rooted I only place the cuttings in morning sun and shade them in the afternoon as the high afternoon temperatures can still dry out the cuttings.
Using hormone rooting powder always helps as the quicker the roots develop the cuttings can start drawing up their own moisture and they are less likely to dry out.
Quicker root develop also means you can remove the plastic bag earlier to prevent problems with excess humidity and start to treat the cuttings as you would a normal rosemary plant.
If your cuttings keep dying I urge you to have another go and follow all then tips that are detailed in the steps above and you should have a good rate of success with your cuttings!
If any cuttings do die then remove them quickly from the pot to as rotting organic material in the pot is not good for the other cuttings and removing the dead cuttings also give the other cuttings more access to light and more space for their roots.
How to Care for Propagated Rosemary Cuttings
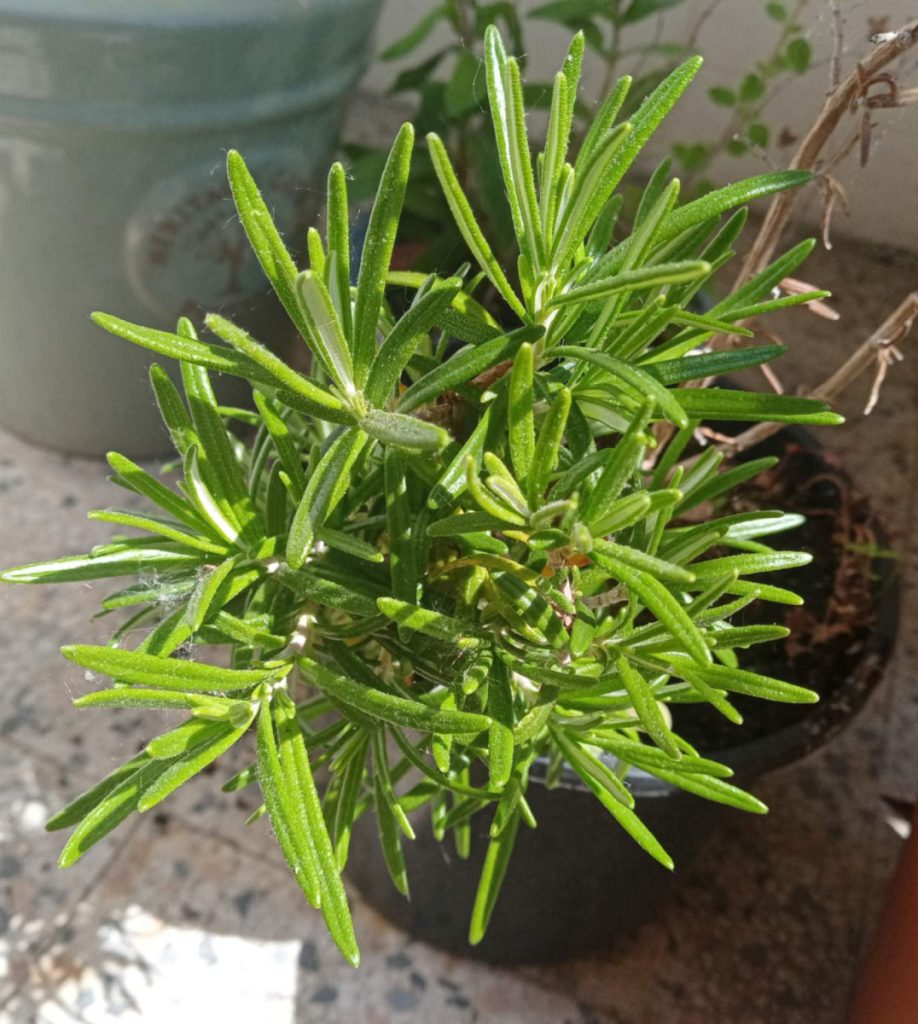
After 3-6 weeks the rosemary cutting should have developed roots and the cutting should display some new growth.
At which point a clear plastic bag is not necessary as mature rosemary plants do not like high humidity.
Once the cuttings have rooted they are far less vulnerable to dying from drought stress but it is still worth watering them once a week to ensure they do not dry out.
Always water with the goal of ensuring the potting soil is evenly moist as if you water too lightly the roots grow near the surface and do not establish properly.
In my experience it is better to keep the rosemary cuttings in the pot then have been propagated in for the first year to allow the roots to develop as much as possible without the disturbance and shock of transplanting.
If you are in a climate with cold Winter and freezing temperatures then it is better to keep the cuttings in a cold frame (which is just a mini greenhouse) or a green house as the immature cuttings are more vulnerable to damage in cold weather then mature rosemary plants.
In the following Spring you can transplant the cuttings into their own pot.
I must re-emphasize the importance planting rosemary in potting soil amended with sand or grit as drainage is critical for these hardy Mediterranean herbs.
Locate the rosemary in full sun and only water if they are in pot and in times of drought.
Do not add any fertilizer as rosemary grows naturally in nutrient poor, sandy soils.
The concentration of essential oils (that are responsible for the fragrance) is higher when rosemary is in nutrient poor soil with lots of sunshine.
Too much fertilizer causes the rosemary to grow leggy with a weaker fragrance and a weaker taste.